Montage Flexlock Invisible
DamitFlexlock Invisible mit seiner RFID-Technik optimal mit Benutzer-und Funktionskarten funktioniert, darf das Schloss ausschließlich an Aufbewahrungslösungen aus Holz, Kunststoff oder anderem, nicht-leitendem Material mit einer maximalen Plattendicke von 25mm montiert werden.
Schloss
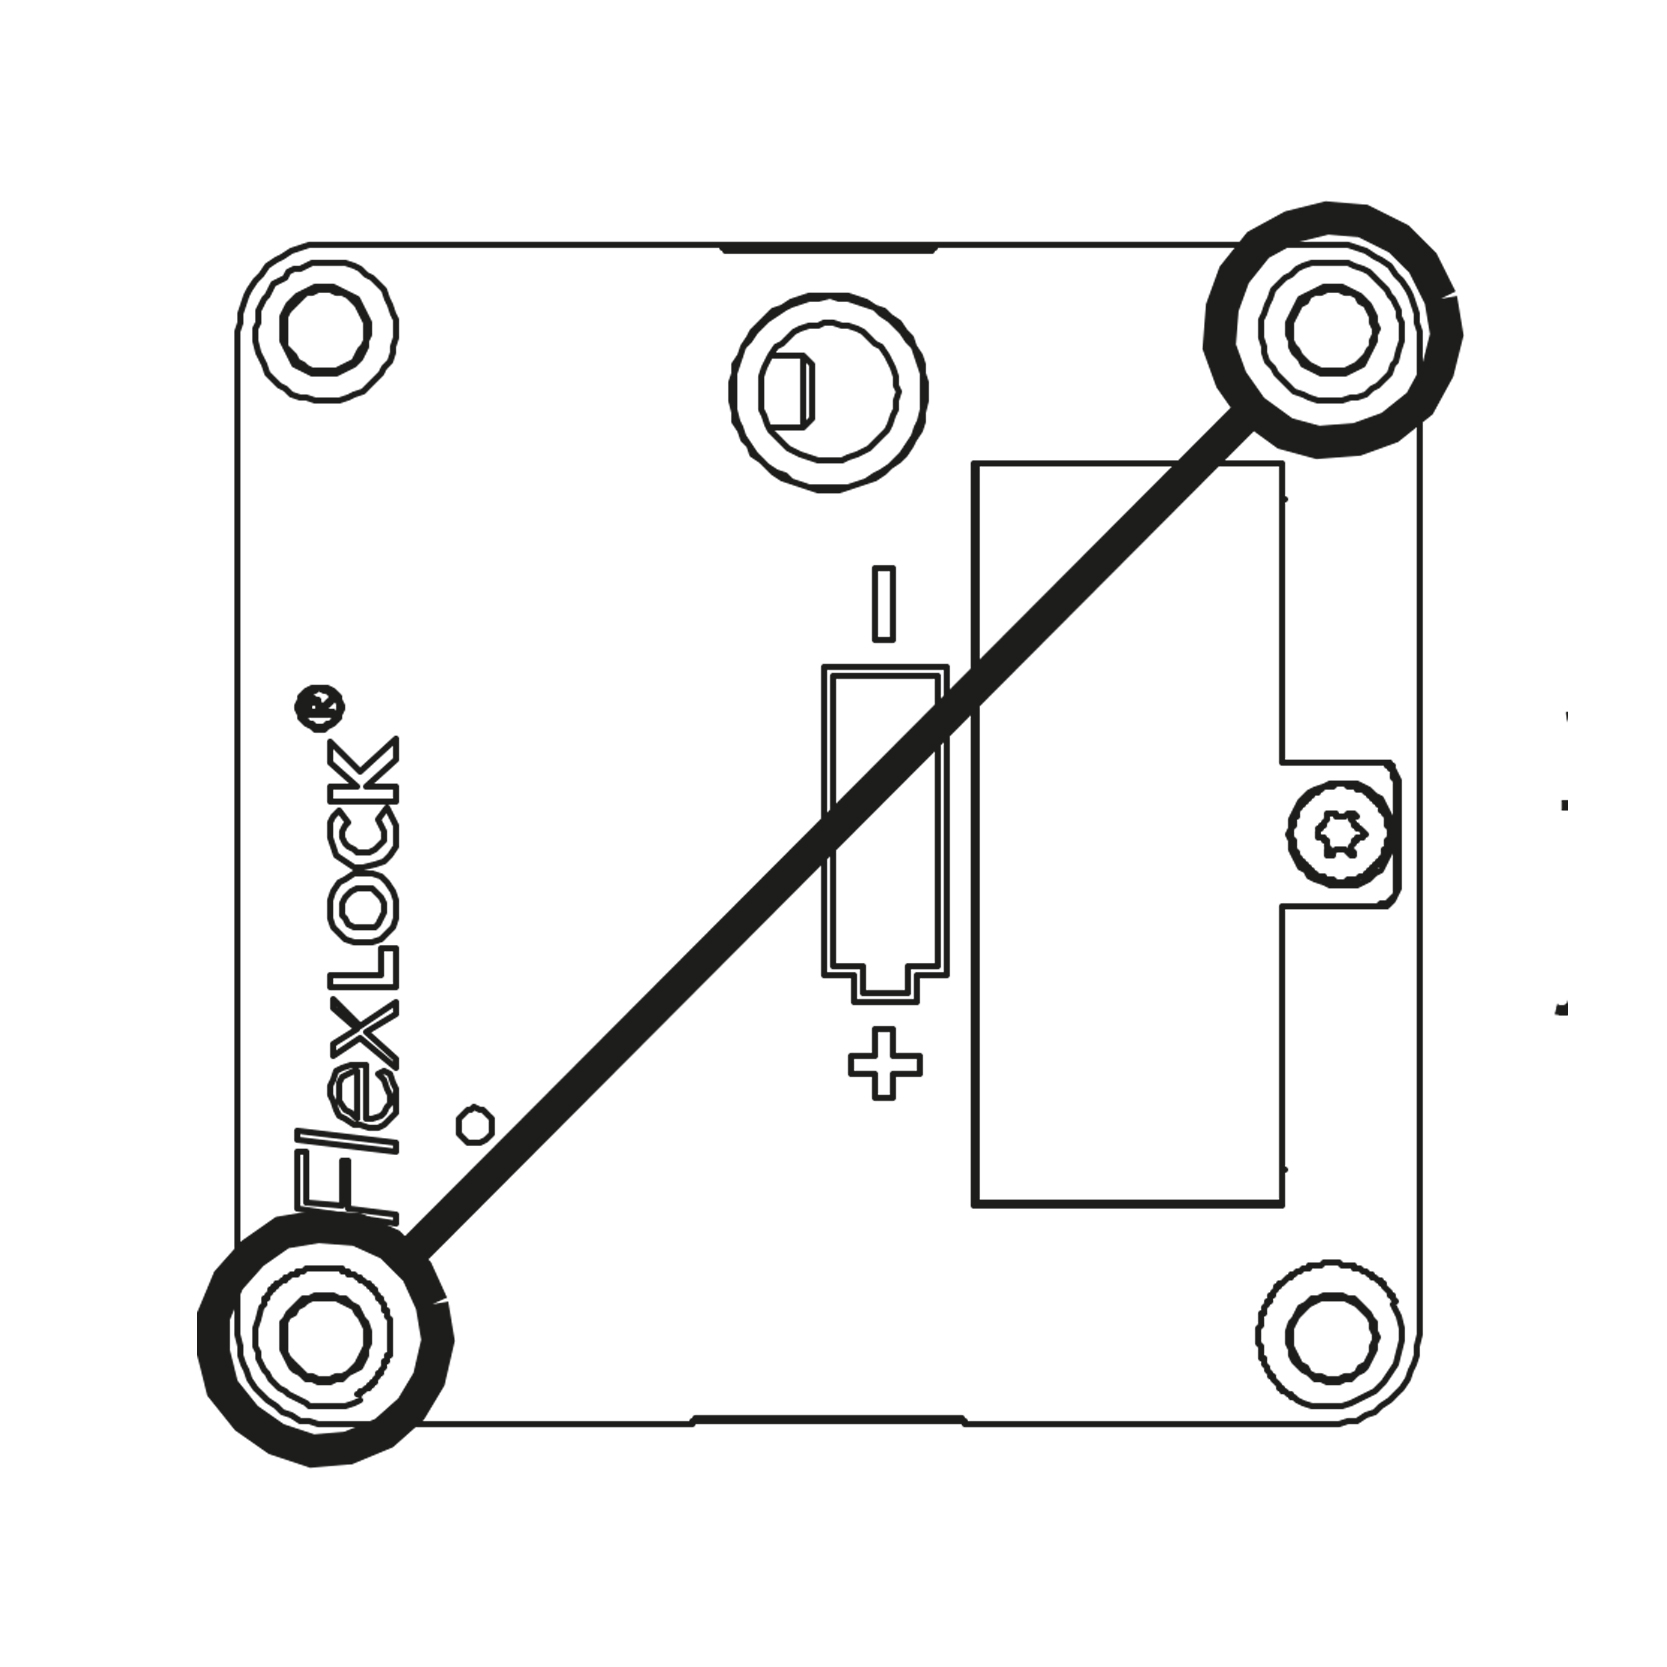
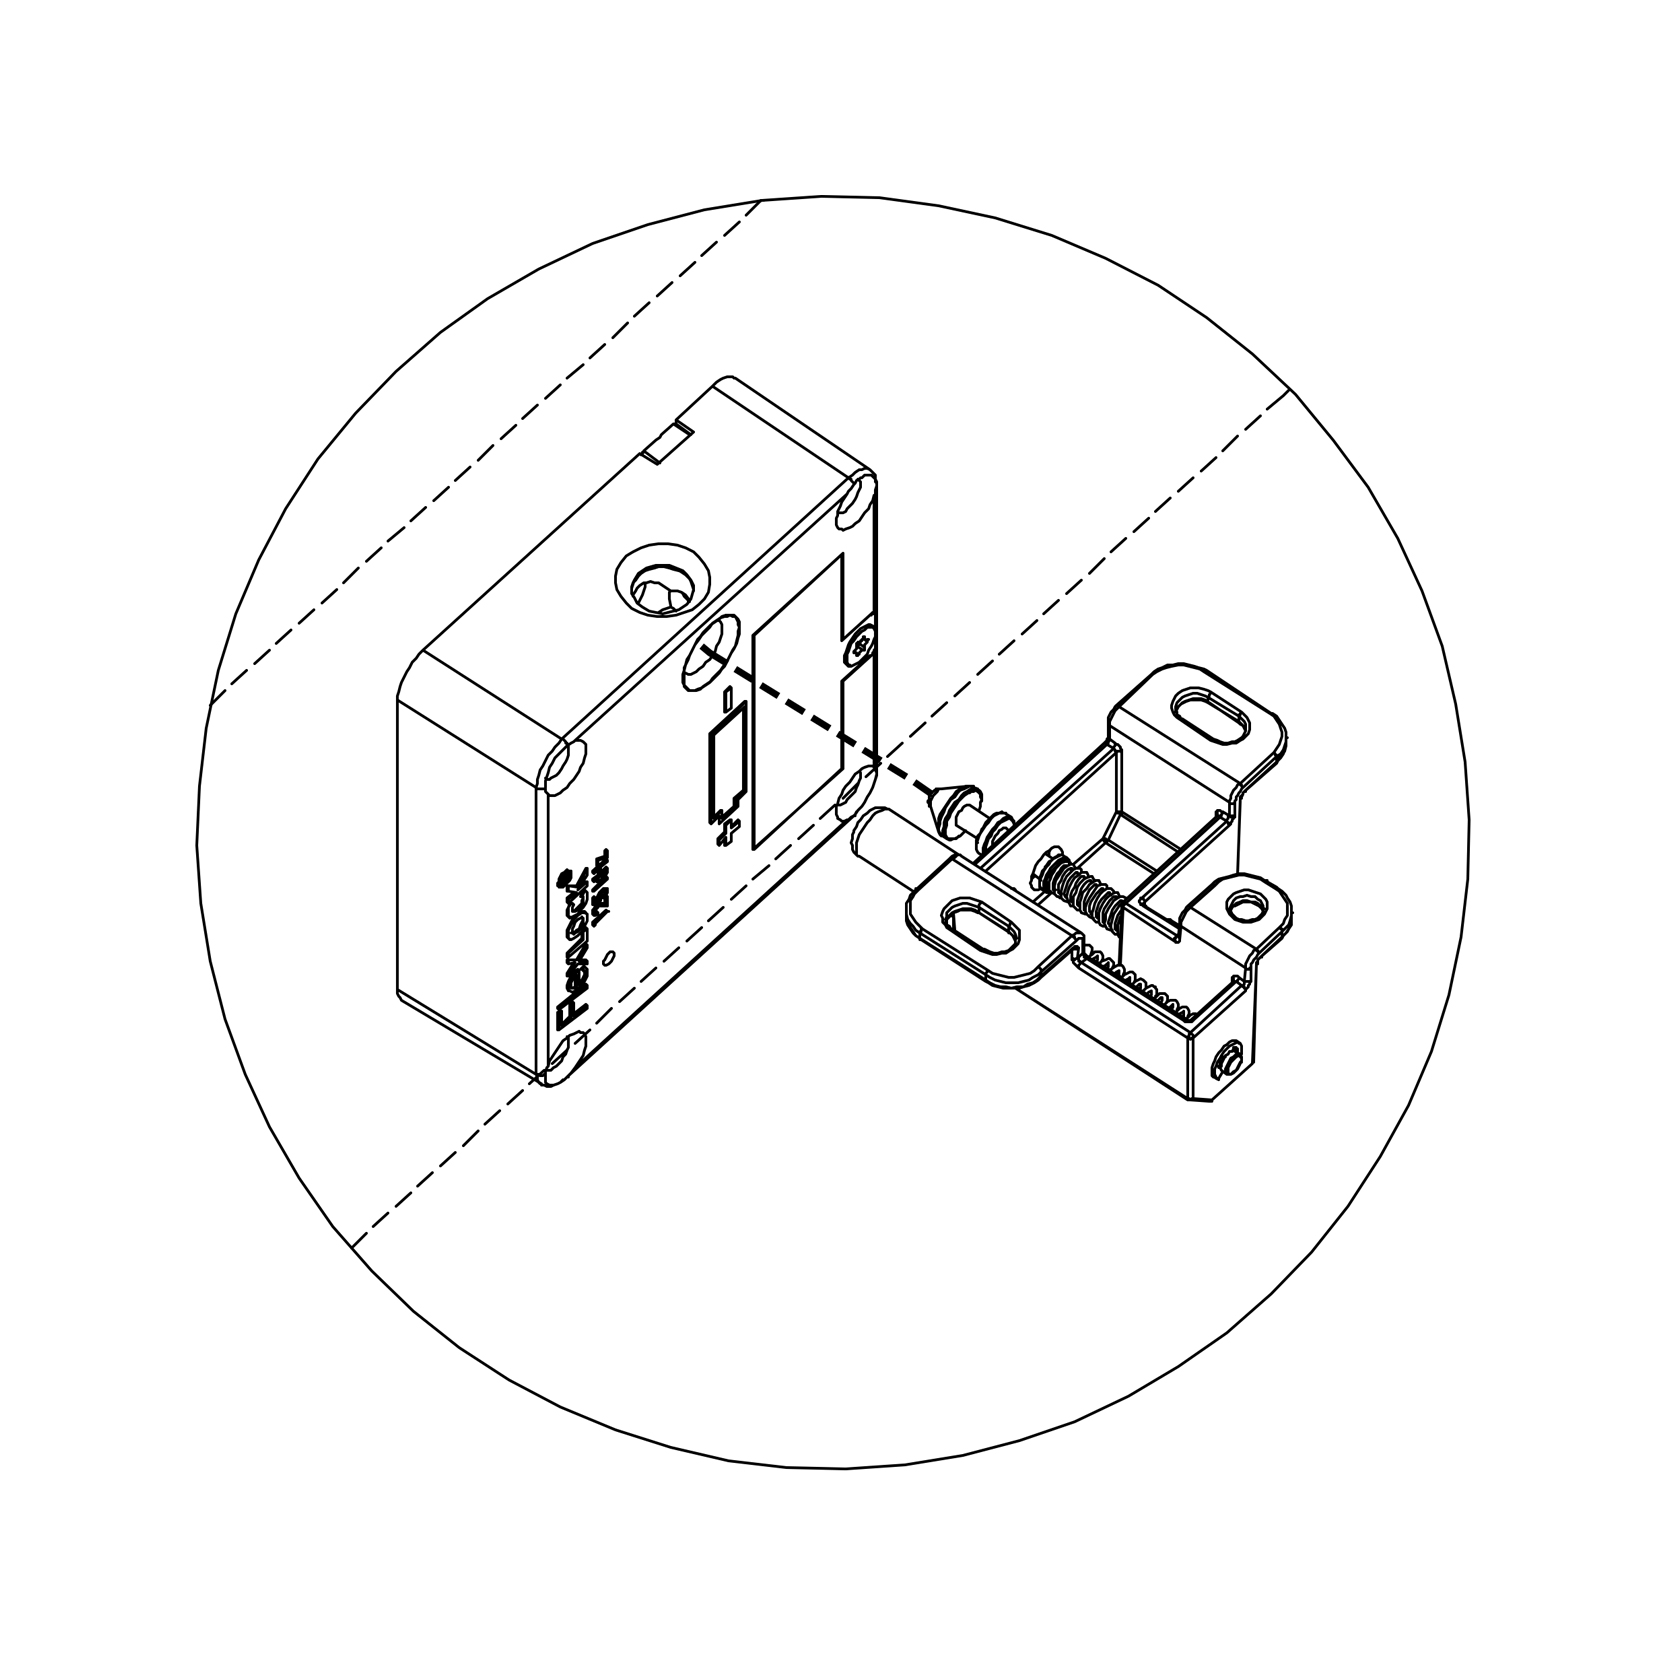
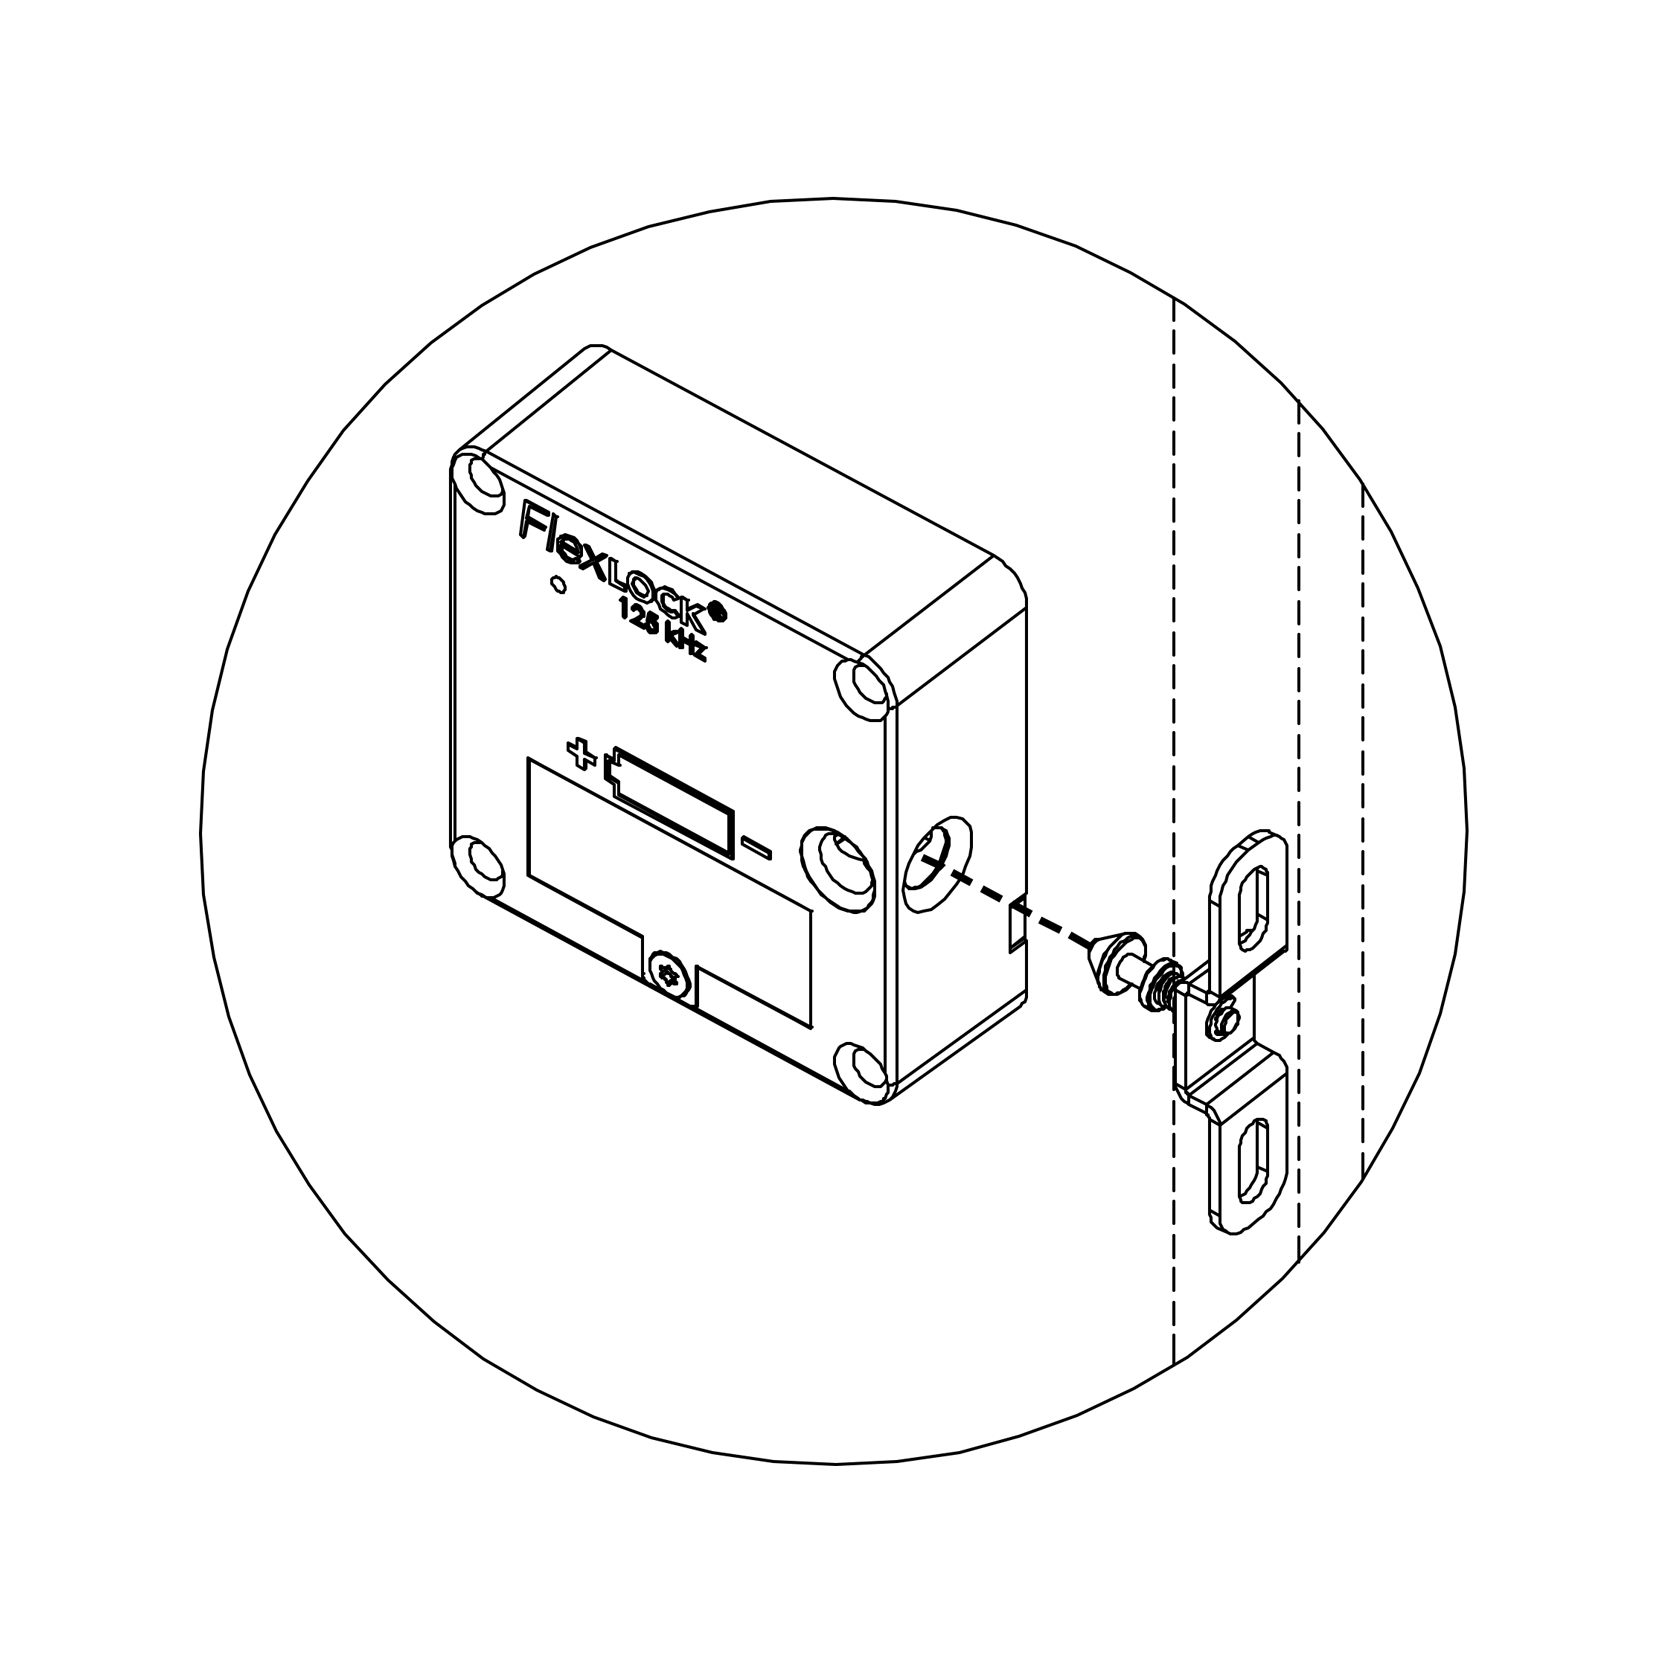
Bei der Montage des Schlosses zuerst zwei Schrauben diagonal festschrauben. Verwahrung probehalber schließen und eventuell justieren, bevor die beiden verbleibenden Schrauben festgezogen werden. Die Tür muss mindestens 14 mm stark sein. Für die Schrauben (4 Stück 4,5x35 mm) ist ein PZ2-Schraubendreher erforderlich.
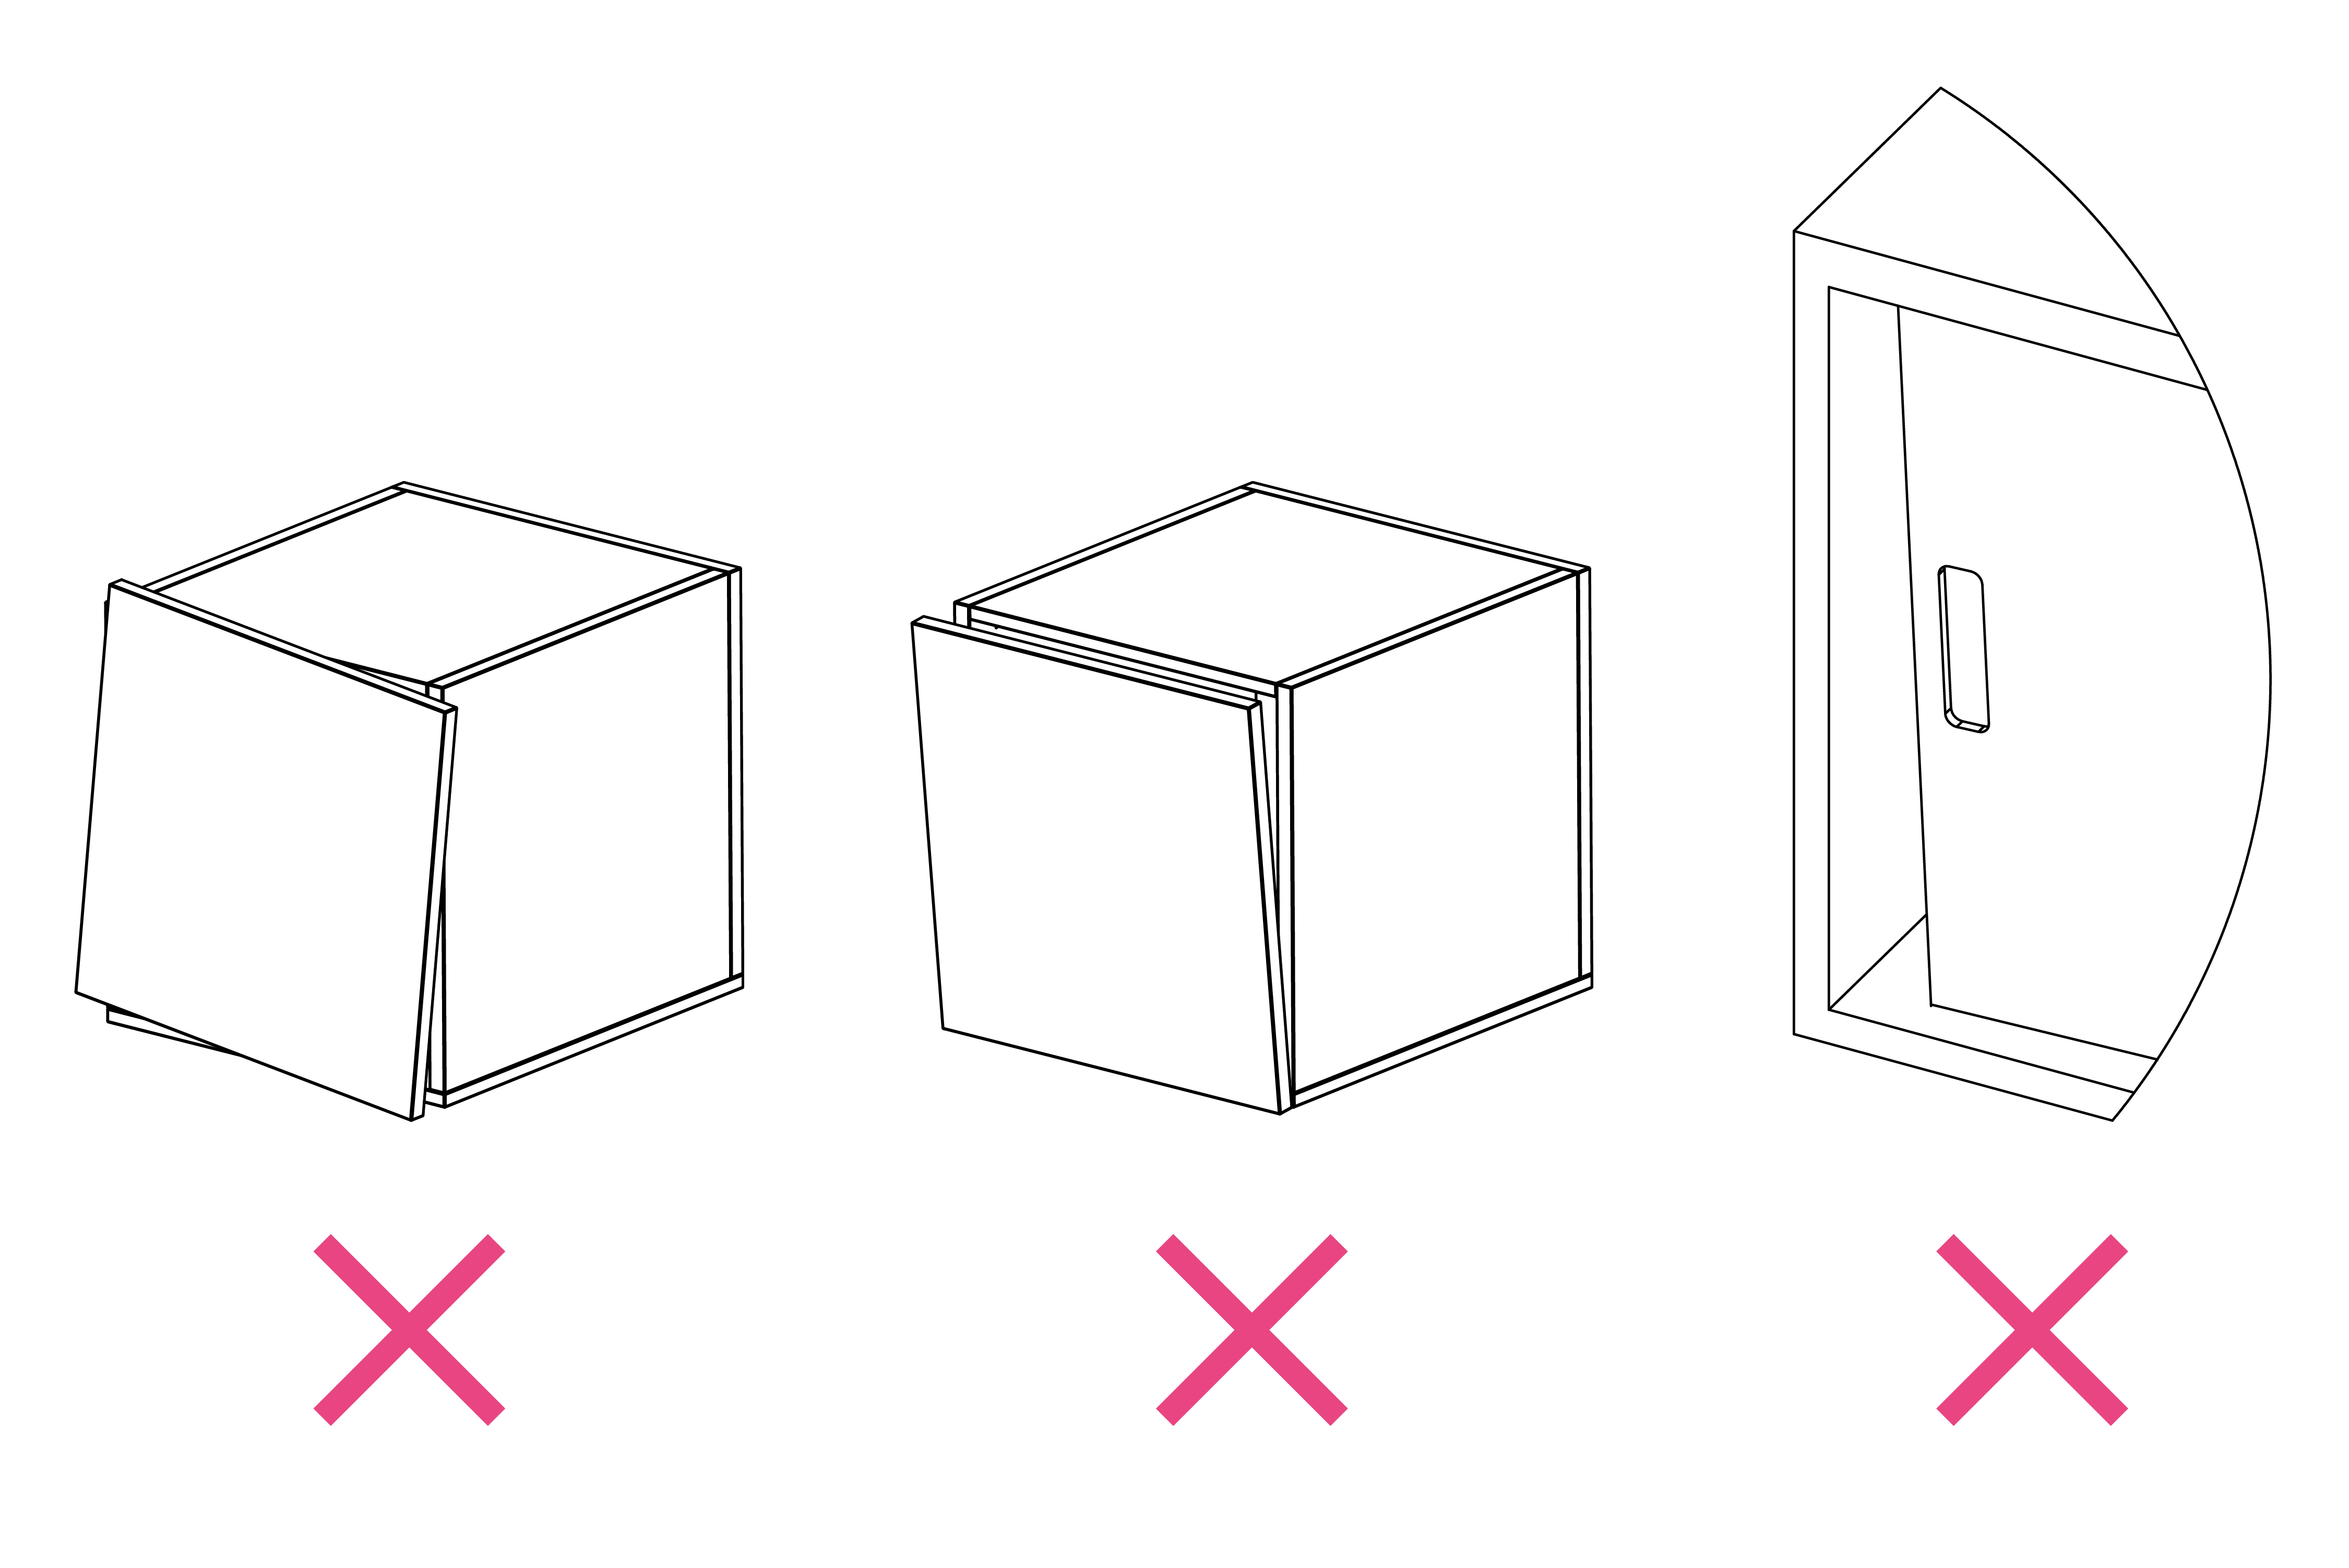
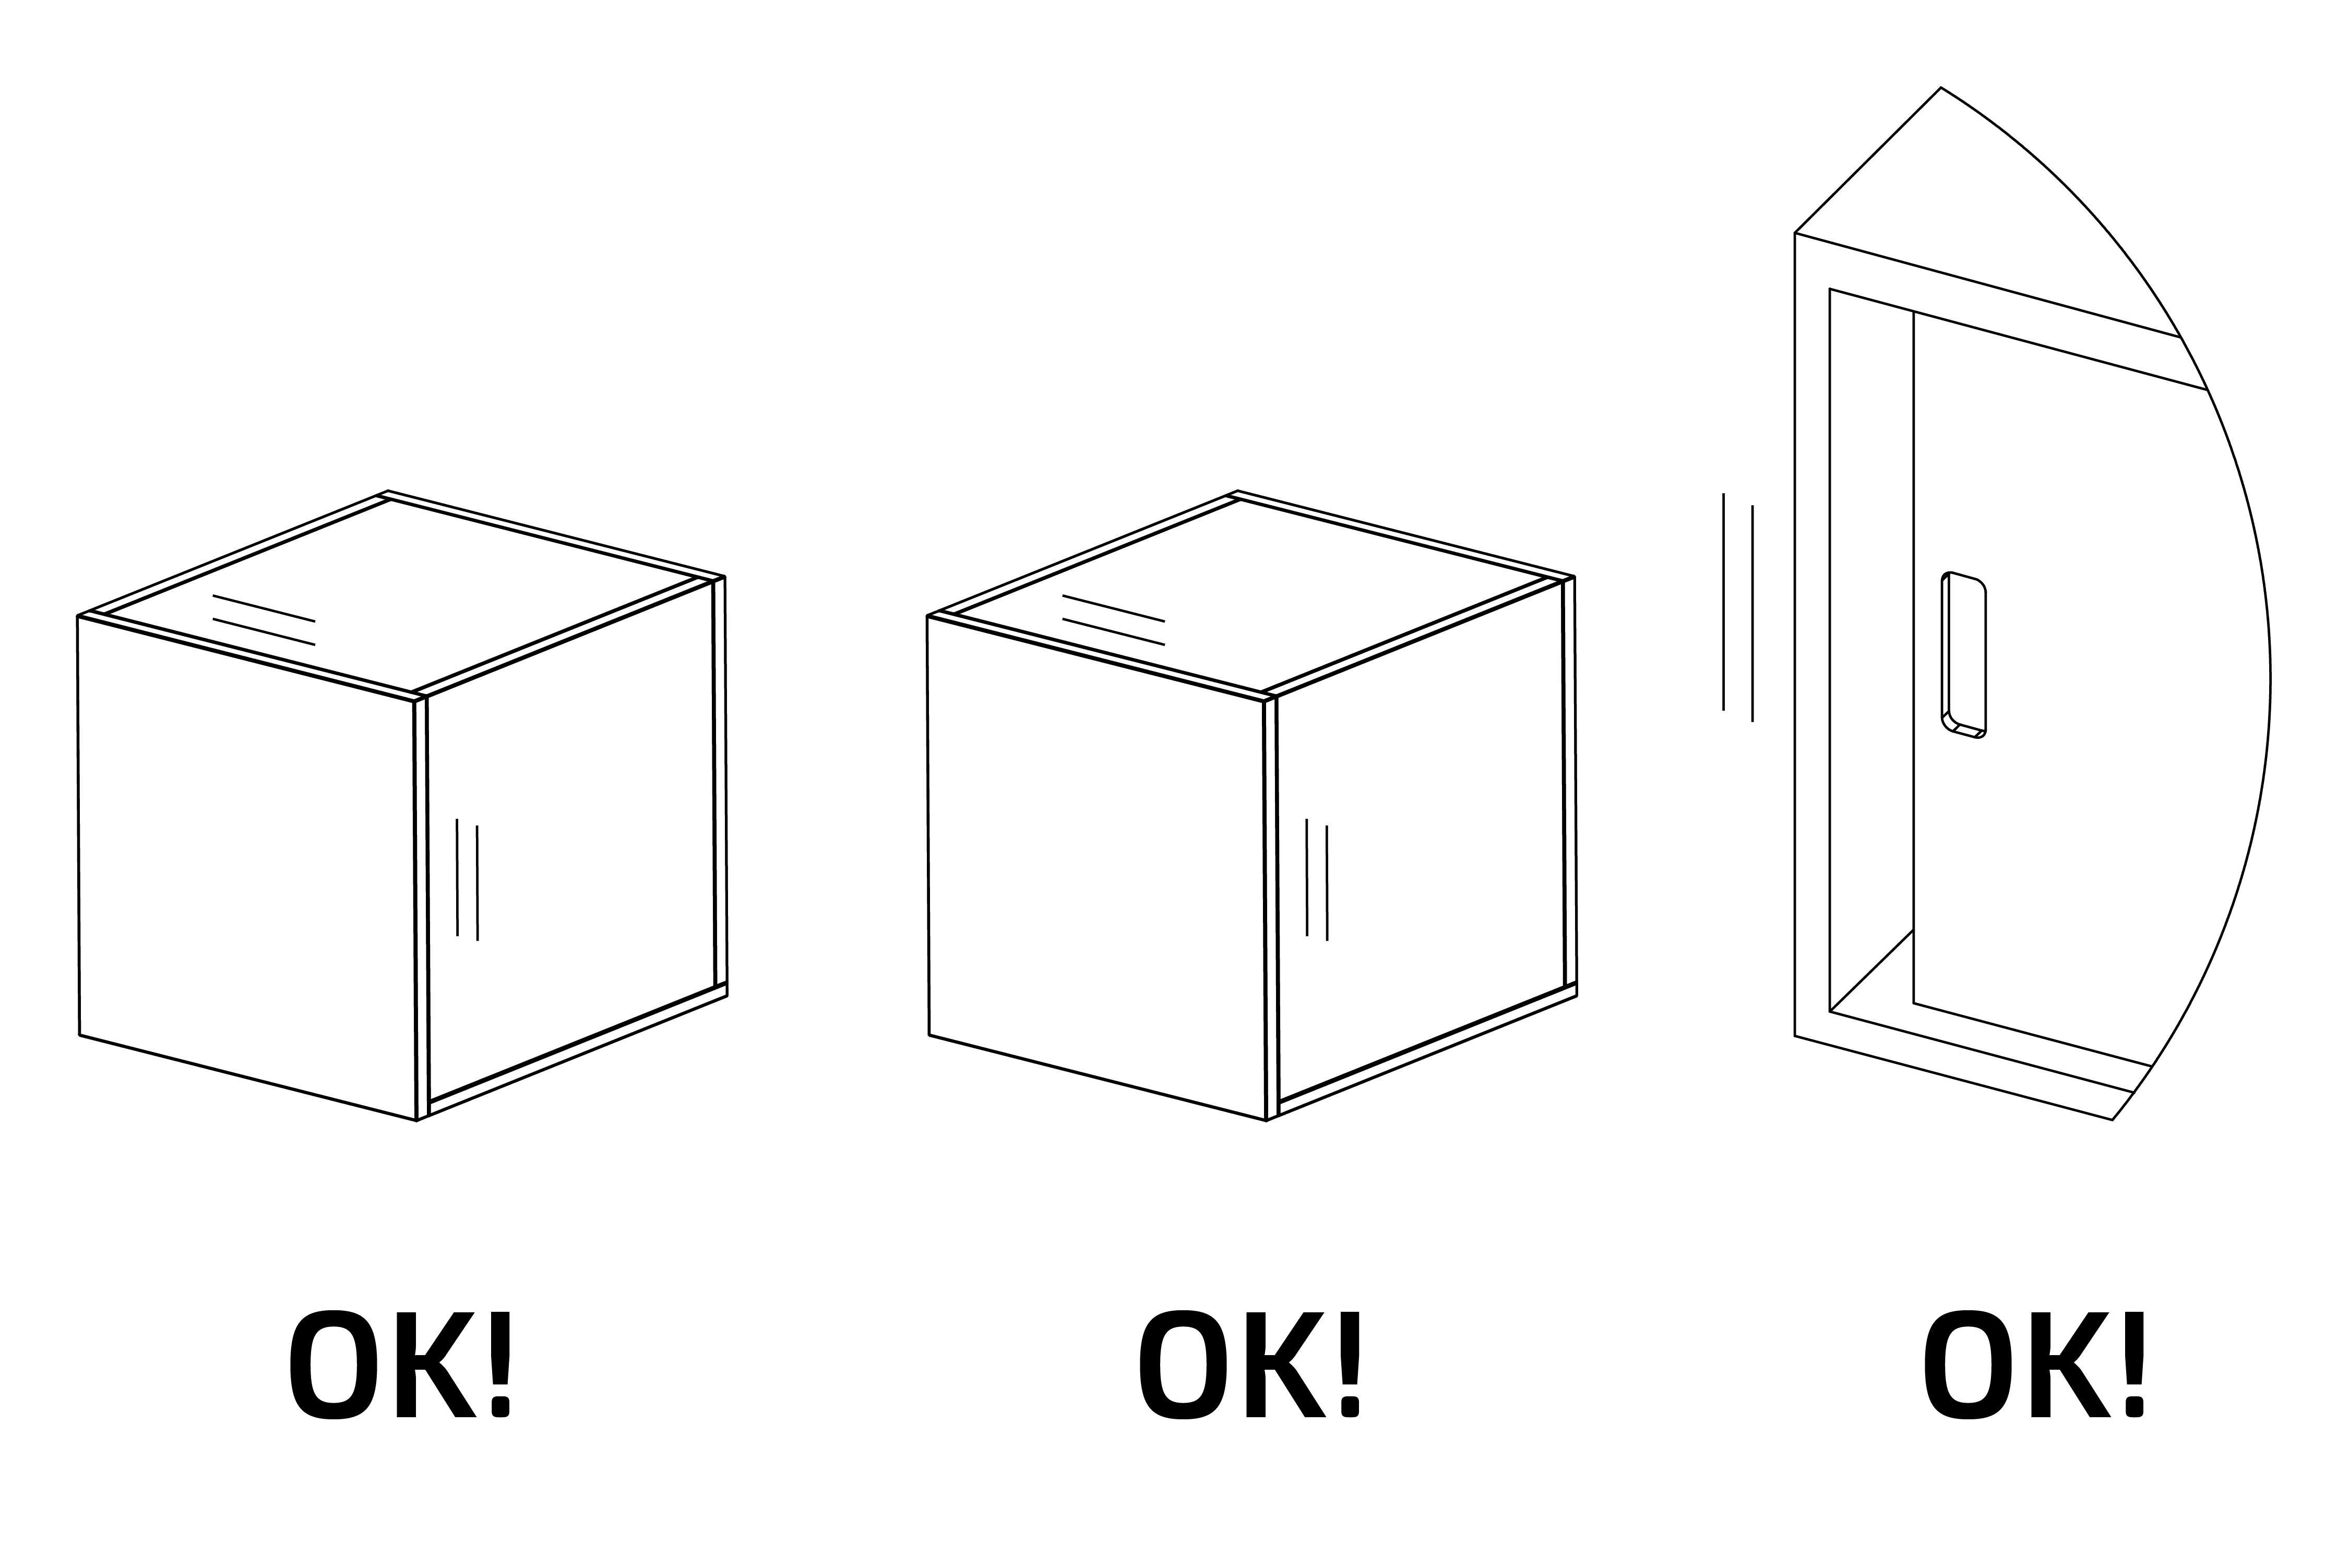
Damit Schloss und Schließblech zusammenpassen, müssen Verwahrung, Türen, Schubladen, Schiebetüren etc. parallel montiert und korrekt einjustiert sein. KontrollierenSie dies vor der Montage.
Schließblech
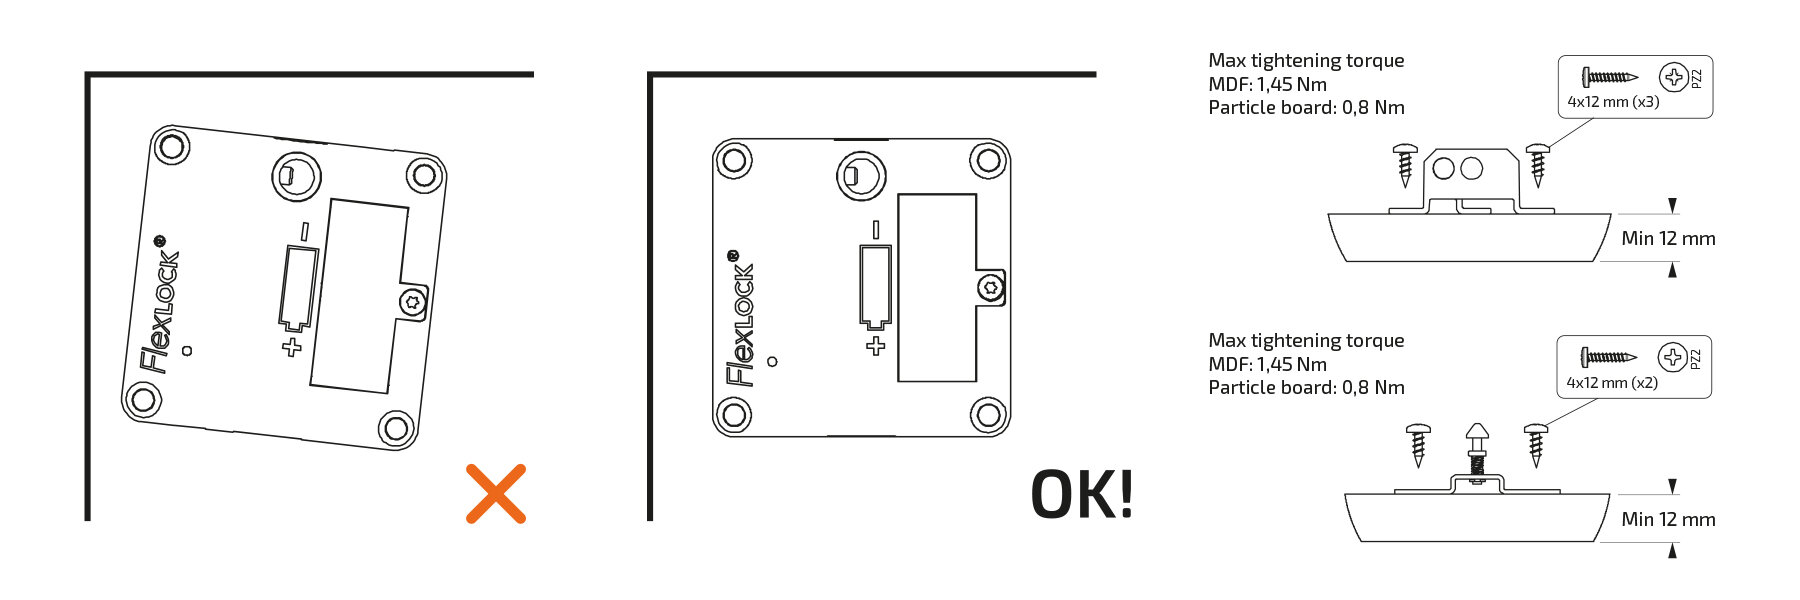
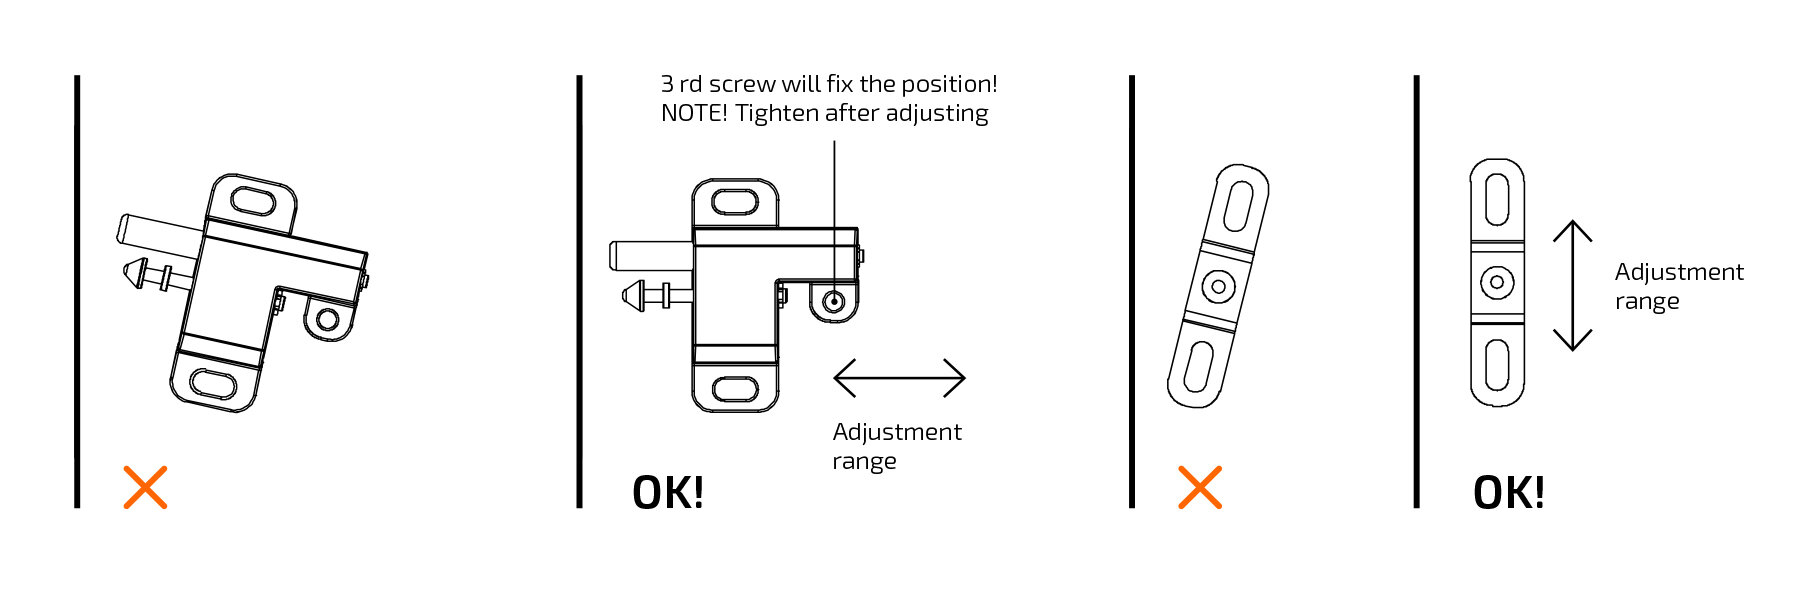
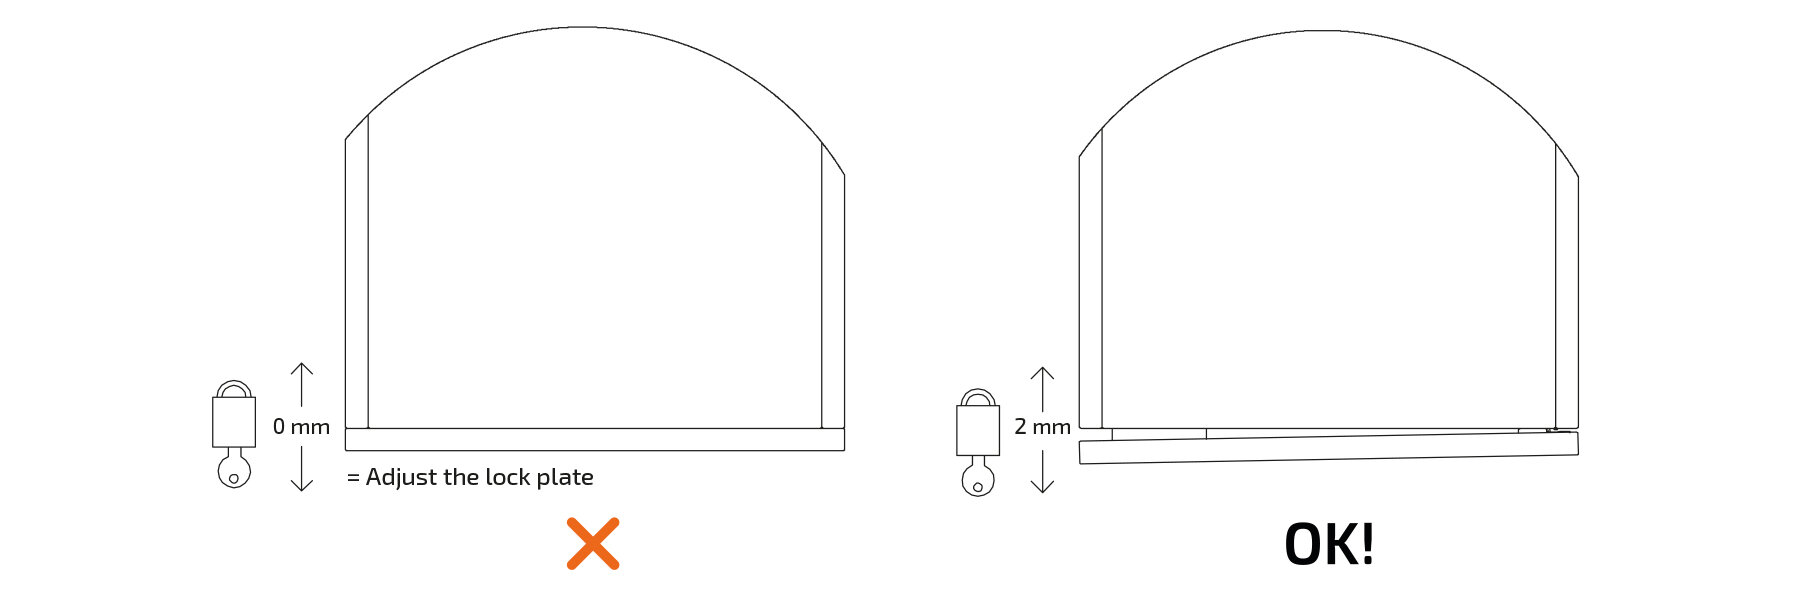
Montieren Sie das Schließblech gerade. Die Materialstärke der Verwahrung muss mindestens 12 mm betragen. Für die Schrauben (2 oder 3 Stück 4x12 mm je nach Typ von Schließblech) ist ein PZ2-Schraubendreher erforderlich. Verwenden Sie den Verstellbereich, um sicherzustellen, dass zwischen Tür und Verwahrung bei verriegeltem Schloss 2mm Spiel vorhanden sind.
Montage an Schiebetüren
Zum einfachen Platzieren von Flexlockmit Schließblech an Schiebetüren sind diePositionierschablone 171132 und die Markierungsschablone 171112 als Zubehör erhältlich.

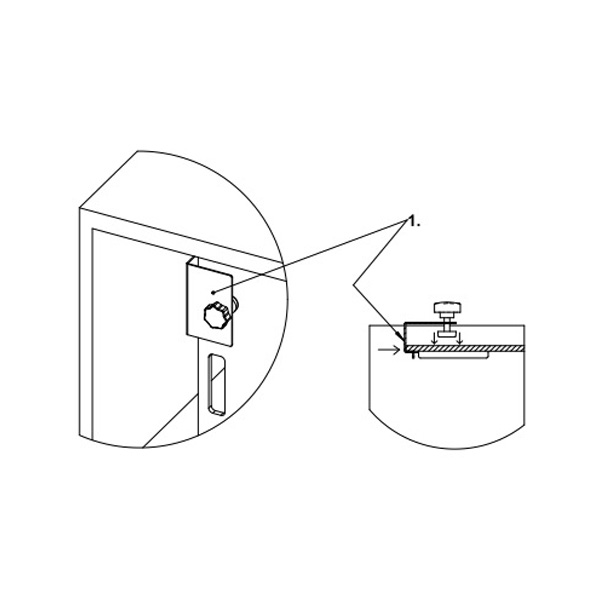
1. Platzieren Sie die Positionierschablone an einem geeigneten Platz an der Schiebetür und ziehenSie die Klammer an. AchtenSie darauf, dass die Schablone bis zur Türkante geschoben wird.
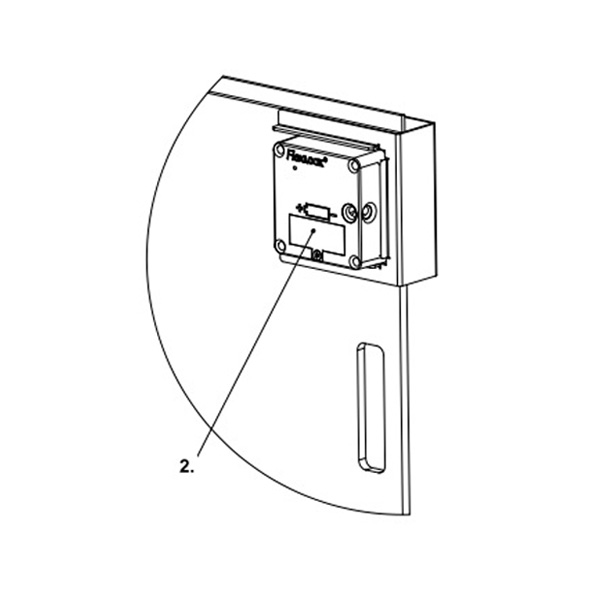
2. Kleben Sie das doppelseitige Klebeband auf die Rückseite von Flexlock, platzieren Sie das Schlossin der Schablone und schrauben Sie es fest.
HINWEIS! Kontrollieren Sie, ob die Programmierkarte eingelesen ist, bevor Flexlock festgeschraubtwird. Entfernen Sie die Positionierschablone.
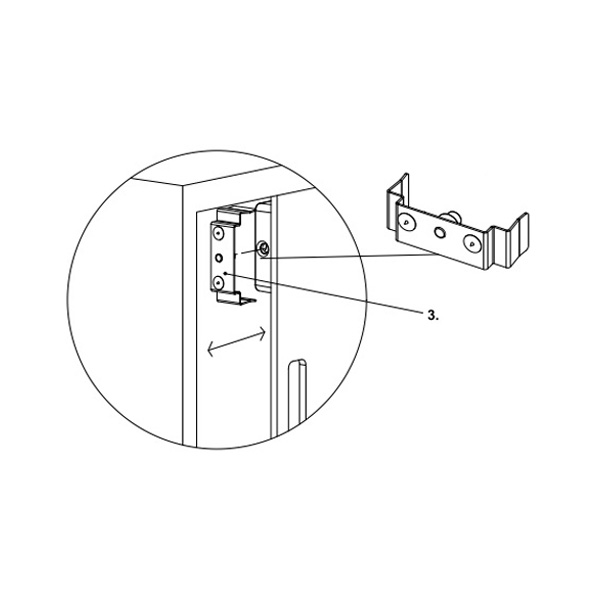
3. Befestigen Sie die Markierungsschablone am Flexlock. Schieben Sie die Tür zusammen. Die Schablone hinterlässt an der Stelle eine Markierung, an der dasSchließblech festgeschraubt werden soll (alt. malen Sie die Stifte vorher mit einem Filzstift an). Entfernen Sie die Markierungsschablone.
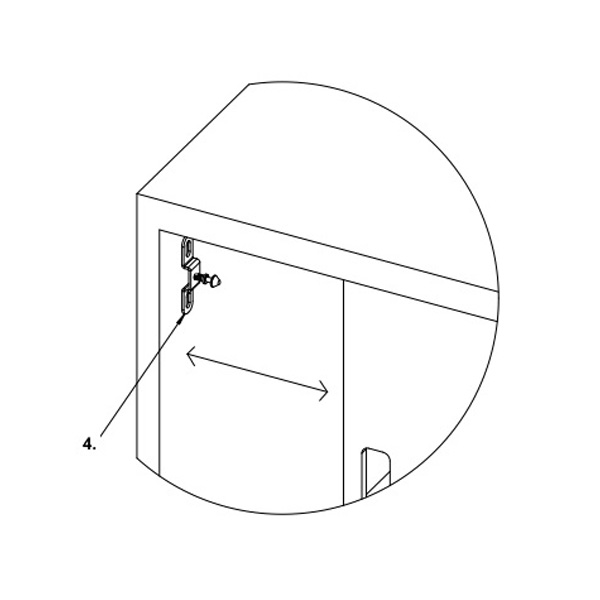
4. Schrauben Sie das Schließblech dort fest, wo die Markierungen sind. Schließen Sie die Tür erneut, um zu kontrollieren, ob sie reibungslos funktioniert und ob das Spiel in geschlossenem Zustand 1,5–2mm beträgt. Testen Sie, ob Sie das Schloss verriegeln und öffnen können. (Eventuell dasSchließblech justieren.)
Montage auf Tür/Schublade
Um Flexlock mit Schließblechauf Türen und Schubladen zu platzieren, sind dieMarkierungsschablone 171241, Schlossattrappe 171221 sowie die Positionierschablonen 171151 und171271 als Zubehör erhältlich.
Markierungsschablone 171241 markiert das Lochbild für das Schließblech.

Die Schlossattrappe 171221 wird verwendet, um Flexlock im Verhältnis zum Schließblech korrekt zuplatzieren.
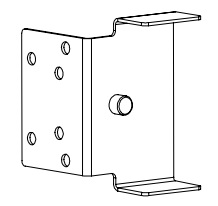
Die Positionierschablonen 171151 und 171271 sorgen dafür, dass das Schließblech beimFestschrauben nicht verrutscht. Verwenden Sie die Positionierschablone 171151 für Lock Plate Catapult.

Verwenden Sie die Positionierschablone 171271 für Lock Plate Catapult+.

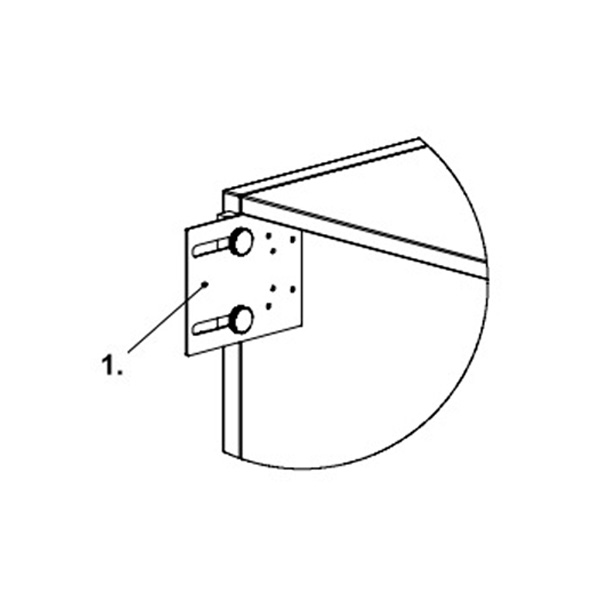
1. Stellen Sie die Markierungsschablone auf die bündige oder aufliegende Tür/Schublade ein. (Siehe Abschnitt Schablonen.) Platzieren Sie die Schablone dort, wo das Schließblech sitzen soll. Markieren oder bohren Sie die Löcher.
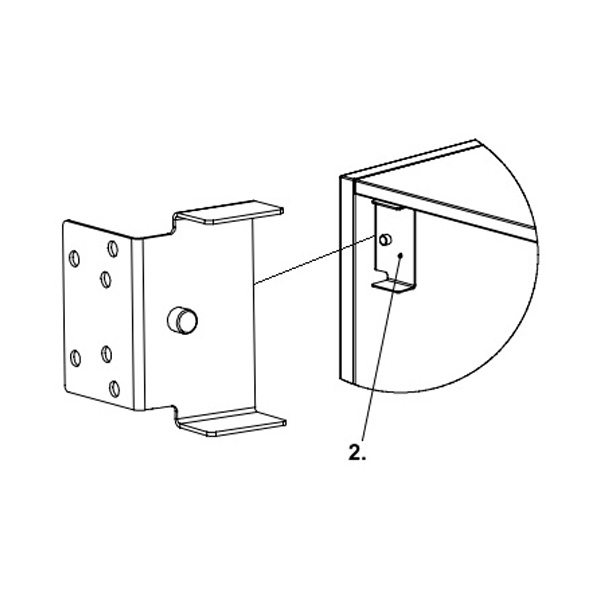
2. Schrauben Sie die Schlossattrappe im Lochbild fest.
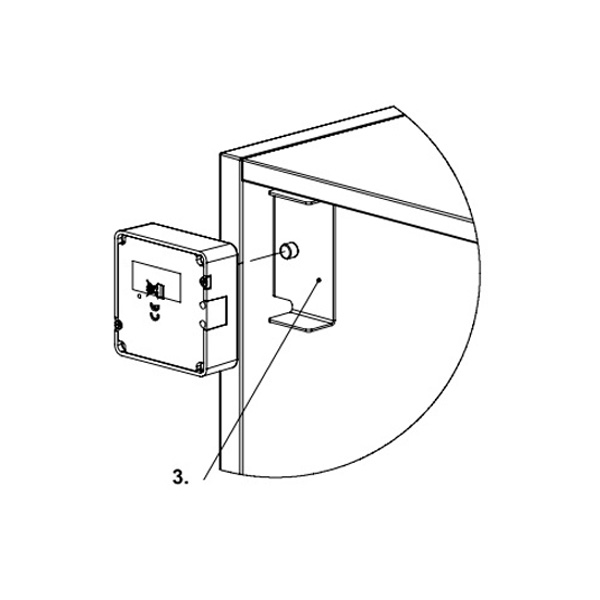
3. Montieren Sie Flexlock an der Schlossattrappe. Kleben Sie das doppelseitige Klebeband auf die Rückseite des Flexlock-Schlosses. HINWEIS! Kontrollieren Sie, ob die Programmierkarte eingelesen ist, bevor Flexlock festgeschraubt wird.
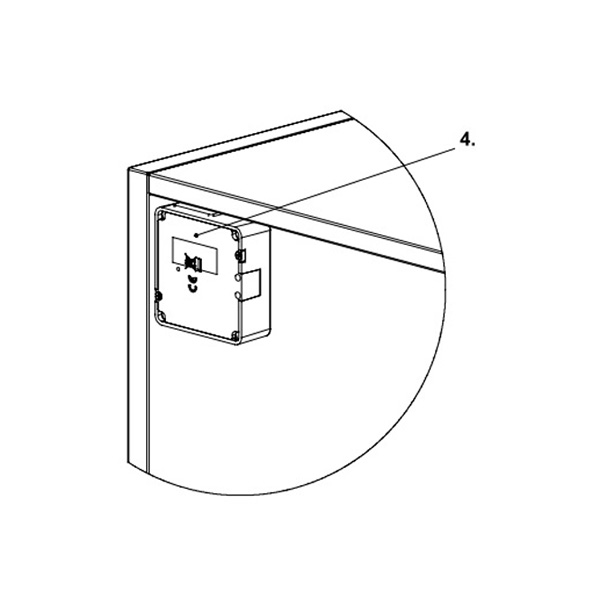
4. Schließen und öffnen Sie die Tür/Schublade. Das Schloss sitzt jetzt an der Tür/Schublade und kann festgeschraubt werden. Entfernen Sie die Schlossattrappe.
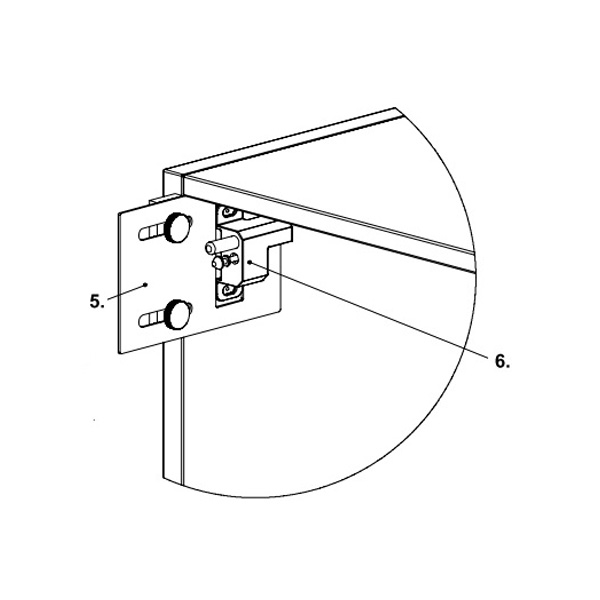
5. Stellen Sie die Positionierschablone genauso ein wie die Markierungsschablone. (SieheSchablonen.)
6. Platzieren Sie die Schablone am Lochbild und schrauben Sie das Schließblech fest. Schließen Sie die Tür/Schublade erneut und kontrollieren Sie, ob diese reibungslos funktioniert und ob das Spiel in geschlossenem Zustand 1,5–2mm beträgt. Testen Sie, ob Sie das Schloss verriegeln und öffnen können. (Eventuell das Schließblech justieren.)

 Sprache
 Svenska
 English (UK/International)
 Deutsch